Once you have made it through all the pre-construction work and you have your permits, you are ready to break ground! This is where it starts to get real. All we had was a pile of dirt for so long and then once the foundation was poured, the framing went up and things started to happen quickly. It’s an exciting time seeing all the work you did designing come to life! There were also lots of things that I knew nothing about and wasn’t prepared for…fireplaces, roofs and plumbing. In this post, I’m taking you through the first portion of our construction and what we have learned or struggled with so far, so that maybe you can prepare or avoid the same pitfalls.

1. Foundation
In this stage, the site will be graded, and forms for the foundation are put into place according to your plans. Plumbing is installed and inspected and the foundation is poured. Once the concrete is down for a day or two, you can walk on it. This was fun because you can make out the floor plan, however I was warned that everything feels so much smaller (it was true). It doesn’t seem like your house will fit on the slab! Make sure you have identified any floor plugs and locations of plumbing and drains prior to this stage because these are things that can’t be easily added or changed once concrete is poured. It’s crazy how much you need to know before this day comes.
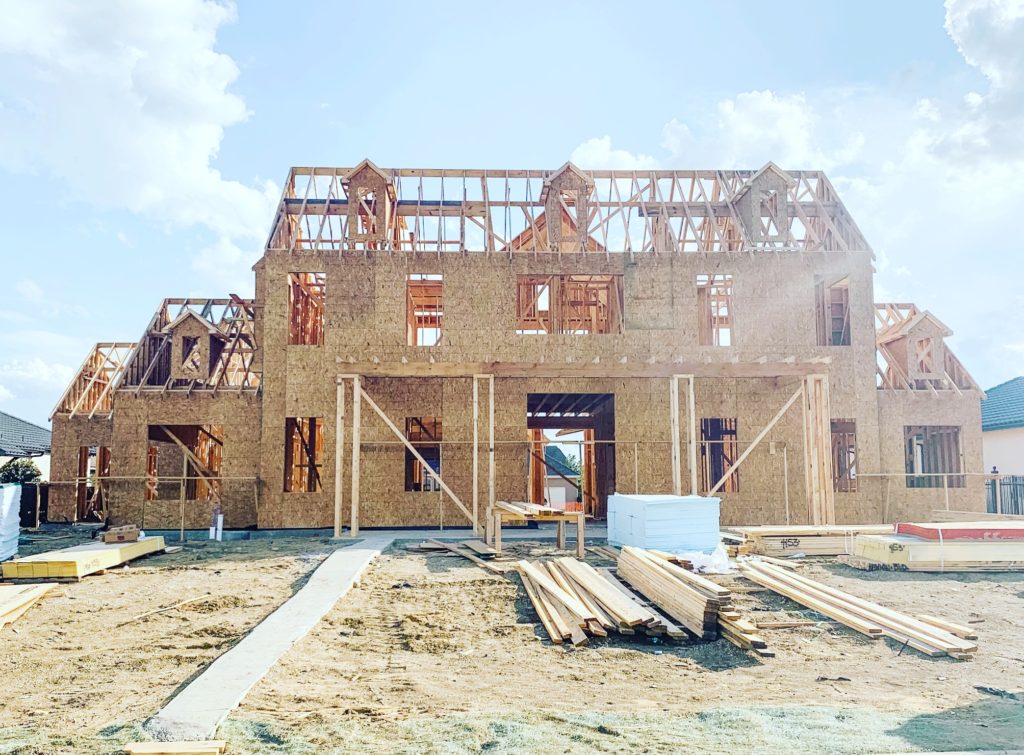
2. Framing
This is where the home begins to take shape. Exterior and interior walls are framed and the roof rafters go on. You will be able to walk through the house and see the rooms and get a feel for the flow. Your framer will be following your architectural plans exactly as they are drawn, so if you want something different and don’t catch it until after they have framed, there will be labor (and possibly materials) charges for the change. For example, we noticed that the platform in our media room was too large causing the second row to sit too close to the screen (something that we didn’t pick up on in the drawings). To cut that platform back cost us $650. But, we could leave it and hate it forever or change it now. Those are the kinds of decisions you will have to make, and there is a cost attached to all changes.
As much as we planned in advance, we still had several small changes throughout the house. The thing that caused the most changes was our windows. I highly recommend having all your windows selected and ordered prior to framing. We did not, and therefore framing was in progress when our final window selections were made. It ended up costing us to alter some of the framing to fit the windows after the fact. A cost that could have been avoided if the exact windows had been identified by a window provider, prior to framing. The architect had called out the window sizes on the plans, but for various reasons we needed to make changes to the original plans (one window was drawn in a way that would have cost us $20k alone). We didn’t know what the price was for all the beautiful windows in our plans until we started working with someone who could sell them and put a quote together. So, just make sure you engage an actual window salesman earlier in the process, and don’t rely on your architect to specify all the windows without knowing what is actually designed and the price tag.

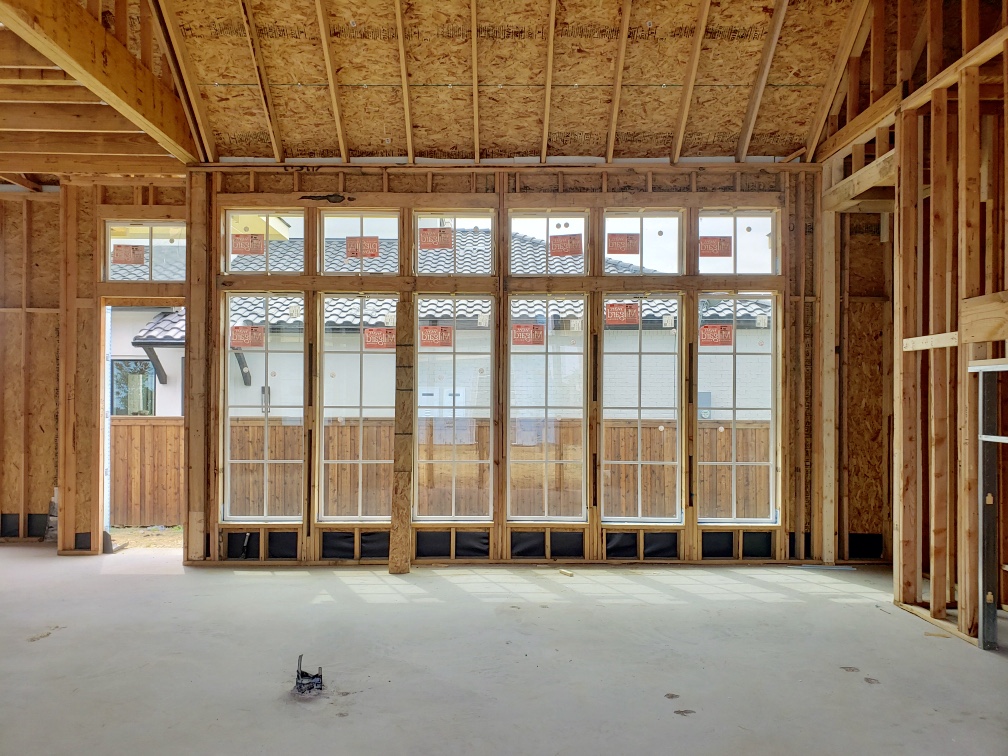

3. Roof/Windows
During this stage, the house is “dried in” and the exterior sheathing, roof deck, shingles, windows and doors are installed. I already cried a little to you about to the windows, but it was a serious undertaking for us. Our home has lots and lots of windows. One thing we learned was that you can get vinyl windows for a fraction of the cost of wood windows. However, vinyl can only be made up to a certain size. That worked for the majority of the windows in our home, but we have several windows that are oversized and could not be made from vinyl. If you have spotted the thin black metal doors and windows in Restoration Hardware catalogs, Architectural Digest and other inspiration pictures online, most likely what you are seeing are windows/doors made of steel. They are beautiful, but costly and not energy efficient. One of the steel door units we went to look at was $30,000 and we needed several…needless to say we had to find another option, unless we wanted our window budget to be over $300,000. The next step down from steel/iron is wood. Wood windows and doors are still expensive. We were able to find a good compromise between the look we wanted and the price by going with aluminum windows for our large, special french doors and windows, from a company named Quaker. They should be installed next week, and I am sooo excited to see them in. They are the piece de resistance of our home.
The roof was another thing that we had challenges with. A lot of the homes I am inspired by online have cedar shingles or slate tile. Cedar isn’t allowed in most neighborhoods in Texas and has other drawbacks and faux slate roofs add about $50-$100k to the cost of the roof. I wanted that look, but with so many other things to spend our money on, it wasn’t worth it to us to splurge on the roof at this time. The great thing about custom building is that you can source items from anywhere and have all the options you could ever want….that’s also one of the hardest things about custom building! Our builder just told us to “find a roof we liked”, so we spent a lot of time driving around and looking at roofs. The colors from the roofing company’s websites look so different online and it helps to see them in person and applied to a real house. Finding a roof we liked (within our budget) proved to be a frustrating experience for us. Ultimately, we went with a basic “30-yr laminated architectural shingle” and chose a medium gray.
4. Trades
This is the step we are currently working on! This is when the mechanical work of the home is completed. This includes plumbing, HVAC, electrical, TV/Phone, and AV wiring. This is when you have to make final decisions on the positions of all your decorative lighting, outlets, light switches, TV’s etc. I am a wall sconce girl, and going through the electrical plans and making sure all of my location choices were notated was huge. This means your design pretty much has to be wrapped up so you know where everything is going. Just like the framer, the electrician will be following the plans your architect notated lights on, but if you and/or your designer have planned for additional lights or made any changes, it must be red-lined and given to the electrician. You will also get an opportunity to walk through the house during the electrical install to double check the placement of all switches, but the more you can let them know prior to the wiring, the better. Think about where you want the outlets in the kitchen (on your backsplash or under the cabinets?) Do you want any charging drawers or outlets for hair tools in bathroom drawers? Walk into rooms and pretend to turn the lights on, so that the light switch is in a place that feels natural.
The plumber is now going to rough in the plumbing valves, so if you have any wall-mounted faucets, you need to make sure you know exactly how high you want them placed, taking into account vanity heights. We have 3 bathrooms with wall-mounted faucets in this house, and they are much trickier to plan for. Think about that as you are designing. You will also need to walkthrough and do an overall check on the placement of valves for all of your fixtures (like shower heads, handhelds, etc.) to avoid any mistakes. I caught several.
Another thing I did was walk through with my HVAC guy to understand where the placement of our vents and return vents in the rooms would go. Sometimes the tradesmen don’t think about the “pretty”. We would have ended up with vents in the middle of our coffered ceiling and return vents where I planned to hang a chandelier if I had not been present. A simple walk-though or conversation can prevent an annoyance later.
I am so ready to get to more of the fun stages of building. Seeing the house drywalled, bricked and decorative items being installed is going to be the best! I will keep you updated on our progress!






Leave a Reply